Disallow Meals In Bulk

This method of disallowing meals is a time-saver because users can disallow all meals for a day or all meals for a participant instead of going meal-by-meal.

- Login as a sponsor user
- Click on Sites

- Select the site you need to disallow
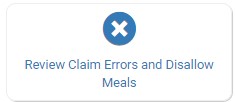
- Click on Check for Errors or Disallow Meals
- Scroll to the bottom of that page and click "View/Edit Meals Disallowed by Sponsor"

To disallow “By Participant”:
- Select “By Participant” in the first dropdown.
- Select individual participant(s) or you can select all
- Choose the date
- Click the green “Load” button.

- In order to disallow a meal, click on the red plus button next to the icon, select the appropriate reason and click save. The box will now have a red background with the number that indicates the reason for the disallow.
- You may also select the green “Disallow All” button at the top to disallow all meals in that week with the same reason.
- There is also a red “Remove All Disallows” button that you can click if you would like to remove all of the disallows for the week.
- At the top of each date is another red plus button. You can click here to disallow all meals for that date. Choose your appropriate reason and click save.

Note: There is a list on this page with all of the available reasons for disallowing a meal. Each reason is numbered and those numbers appear in the table for each disallow. You are able to view the entire week and quickly see the reason for each disallow. You can also print this information for your records with the Disallowed Meals Report.
To disallow “By Meal”:
- Select “By Meal” in the first dropdown.
- Then select meal type, roster and date. Note that you are able to select all meal types and all rosters.
- Click the green “Load” button.

- In order to disallow a meal, click on the red plus button next to the icon, select the appropriate reason and click save. The box will now have a red background with the number that indicates the reason for the disallow.
- You may also select the green “Disallow All” button at the top to disallow all meals in that week with the same reason.
- There is also a red “Remove All Disallows” button that you can click if you would like to remove all of the disallows for the week.
- At the top of each date is another red plus button. You can click here to disallow all meals for that date. Choose your appropriate reason and click save.

Note: There is a list on this page with all of the available reasons for disallowing a meal. Each reason is numbered and those numbers appear in the table for each disallow. You are able to view the entire week and quickly see the reason for each disallow. You can also print this information for your records with the Disallowed Meals Report.