1

Monthly Entry by Name

Note: this entry method is not restricted to point-of-service or meal times. This method assumes that original attendance and meal counts are being taken on paper and then transferred in to My Food Program. If you need a method that enforces point-of-service meal counts, please use our configuration with attendance and meal counts on separate screens or attendance and meal counts on the same screen.

To enter attendance and meal counts:

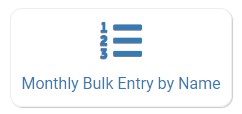
  • Click on "Monthly Bulk Entry by Name" from the main dashboard
  • Select the Month for which you want to enter attendance and meal counts.
  • Click "Done".
  • Select the participant for whom you want to enter attendance and meal counts. Active participants are listed alphabetically by last name followed by inactive participants alphabetically by last name.
  • Click "Submit" to load the page.

Entering Attendance

If you are doing daily attendance, click the box that says "Attendance" next to each day of the month on which the participant attended.

If you are doing in/out attendance, enter the arrival and departure times for each participant

  • Time Entry: You have several options to record a Time In or Time Out depending on your sponsor's configurations
    • Use the time-picker and select the hour and minute.
    • Click the button that says “Now” to auto-fill the current time.
    • Type a time in the box. Required format is hh:mm am or pm.
  • Click “Done”.

If a child or adult day care client arrives and departs more than once in a day (for example, a child attends the center before school and then again after school)

  • Click the blue plus sign on the far right.
  • Enter another set of arrival and departure times.

Recording Meal Counts

Click the button next to each meal that the child or adult day care client attended that month. The button will start out grey and when you click, it will turn green.

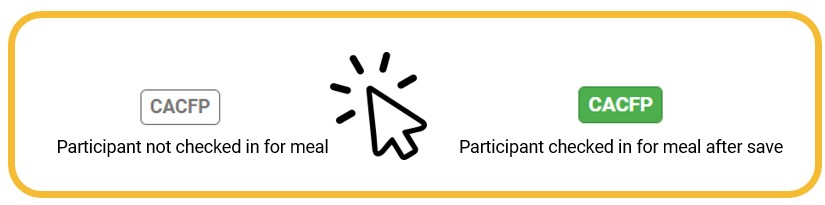
Depending on your site setup, you may see one or more of the following buttons:

  • If a participant has no button to click, check the following:
  • Click "Save"


Note: Meal counts will not be saved if there is no corresponding daily attendance. The system will highlight those for you when you try to save.

Meal Outside Schedule

If your sponsor has this feature turned on, you may see a box that allows you to indicate that a participant is eating a meal that isn't on their typical schedule.


Some examples of when you would use this feature:

  • it is a school release day and there is a school-age child present for a lunch when they normally eat that meal at school
  • a child normally attends Monday, Wednesday, Friday but attends on a Tuesday because of a change in a parent's work schedule


To record a day when a participant is eating meals outside of their normal schedule:

  • Click the box in the column "Meal Outside of Normal Schedule"
  • Provide a reason

Meal Shifts

If your meal operates in shifts, you will see a column for each shift.

  • Click the meal count button for each shift at which the participant was present.

Participants in Multiple Programs

If you are a child care center that is also operating an At-Risk Afterschool Meals Program and/or a Head Start Program, you may have participants with more than one meal count button.


In the example below, the participant is authorized for both the At-Risk Afterschool Meals Program and the standard CACFP program.

  • Click the "AR" button to record this meal as eligible for your At-Risk Afterschool Meals program claim.
  • Click the "CACFP" button to record this meal as eligible for your standard CACFP program claim.

Copy Schedule Meals

You can copy the meals entered into the participant's schedule automatically by clicking "Copy Schedule Meals" at the top of the calendar.

Printing Attendance and Meal Count Sheets

  • Scroll down the page and click the green “Print” button on the bottom-left corner to generate a PDF for printing.
  • You may need to adjust your printer setting, especially the “fit to page” to ensure that the page prints correctly. We also recommend turning off headers and footers during printing. 


Note: if you would like to print paper forms for all rosters simultaneously, this can be done in the “Reports” section.

  • Click "Reports" from the main dashboard
  • Select "Recordkeeping Reports"
  • Select "Paper Back-Ups"
  • Select the week and roster for which you would like to print. From here, you can also “Select All”.
  • Click the green “Run Report” button.
  • Click on the “Download Report” hyperlink that appears to open your file.
  • Select the week and roster for which you would like to print. From here, you can also “Select All”.
  • Click the green “Run Report” button.
  • Click on the “Download Report” hyperlink that appears to open your file.


The paper forms generated in reports have a slightly different appearance than the paper forms generated using the method outlined above.

Still need help? Message Us