Process Claim for Individual Site
NOTE: the dashboard icon “Review Claim Errors and Disallow Meals” is called “Check for Errors or Submit to Sponsor” if logged in as a site-level user. In addition, site-level users do not have a “Process Claim” dashboard button.
The claims process has five steps:
- Meal validation (“check for errors”) by the site.
- Review and correction of any errors by the site.
- Submission to sponsor by the site.
- Correction of any errors by the sponsor.
- Claims creation by the sponsor.
To create a claim for an individual site:
- Click on “Process Claim” from the main dashboard.
- Select the correct month and year from the drop-down menu.
- Click “Create Claim”. Please note: an on-screen message will appear if a sponsor tries to create a claim at the site-level and the site has not clicked “submit to sponsor”.
- My Food Program will now go through the meal validation process. Depending on the size and configuration of the site, this may take several minutes.
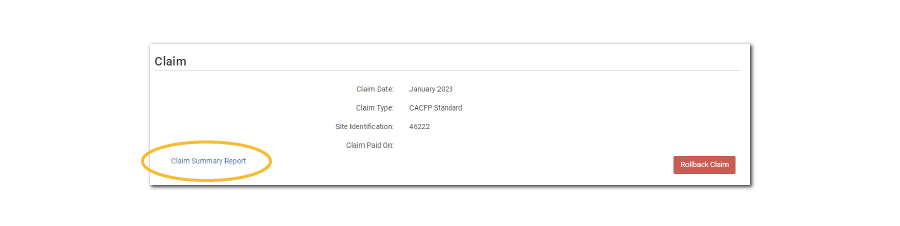
- When the claim is finished, you will be directed to the claim screen.
- For a summary of payable meals and additional details, you can click on the Claim Summary Report link on the bottom left.
Sponsors can now group their claims into batches in order to track multiple claims submissions to the state agency. To create a claim for an individual site with batches, be sure to turn on batch claiming in Sponsor Setup.
On a monthly basis, running claims in batches has two steps:
Step 1: Name your claim batches.
- On the sponsor dashboard, click “Claims” and then “Manage Claim Batches”.
- On the next screen you can name the Claim Batch (you can use a
simple 1, 2, 3 system or you can use a date or any other batch naming convention you would like!) and also designate the date that the batch is being submitted to the state and the date your centers or providers can expect payment.
Step 2: Assign each claim to a batch.
- When you run claims, you will be prompted to assign each claim to a batch.